Oops, my battery is dead!
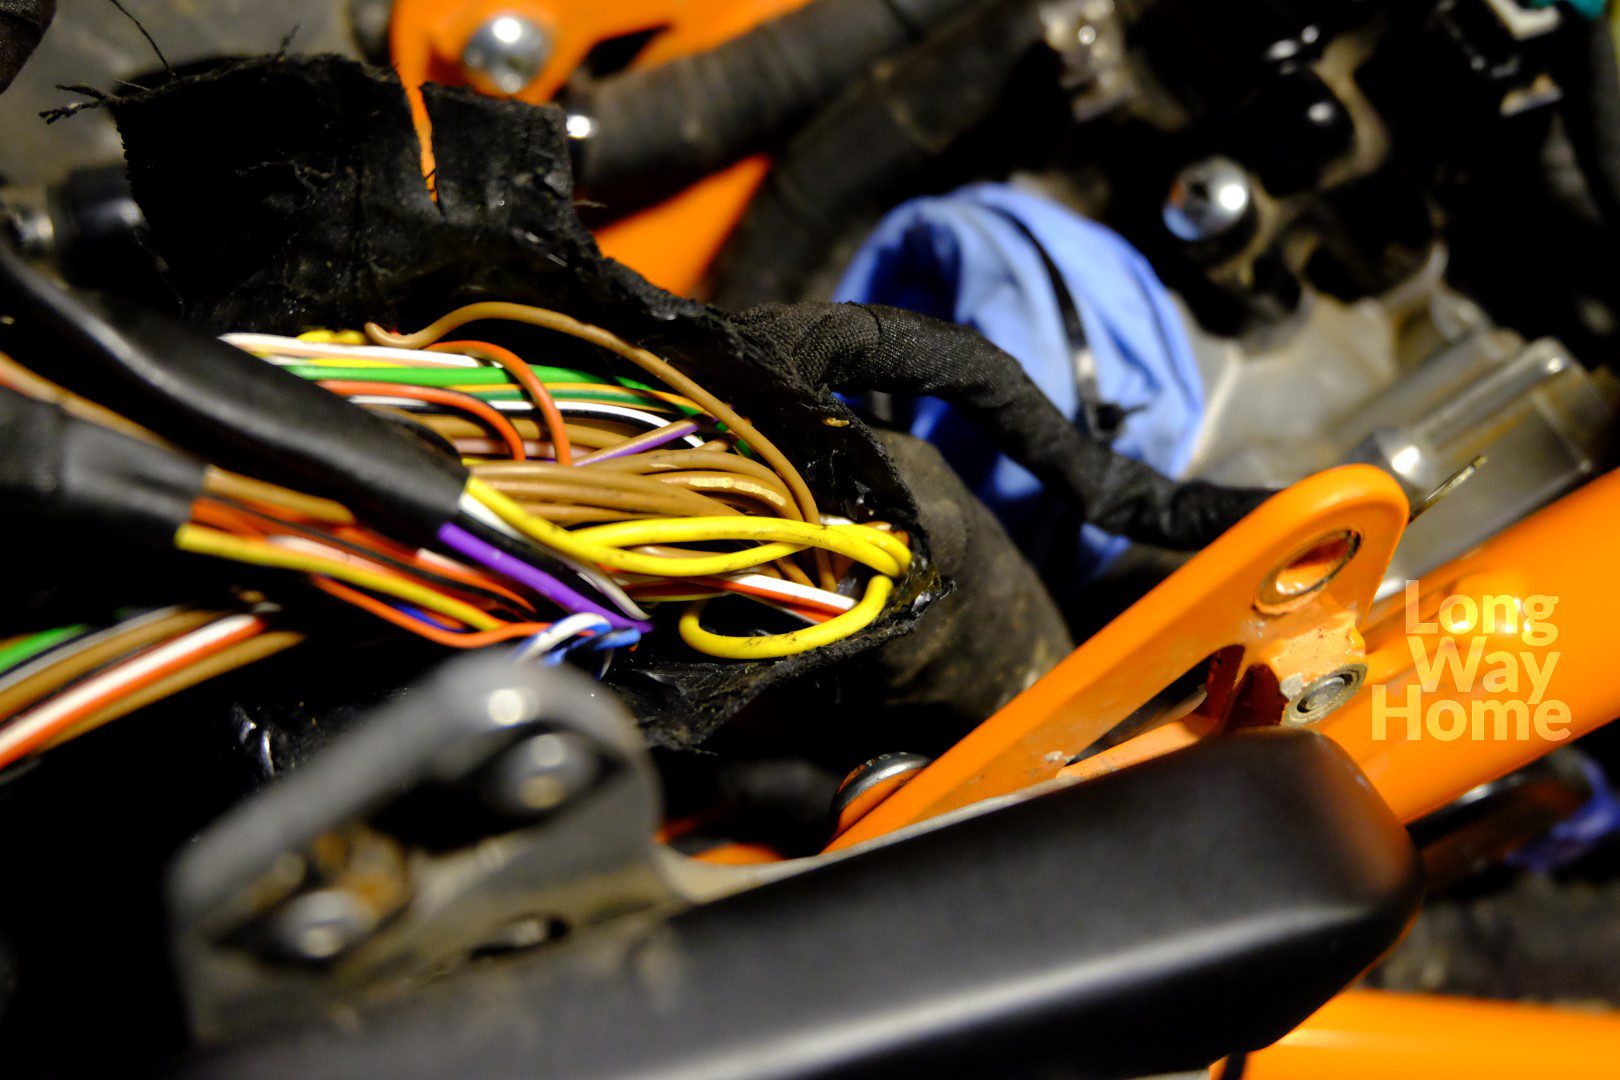
A few years ago a law was introduced in Europe that dictates manufacturers to automatically switch on lights in their motorcycles. Good, it should be safer on roads for everyone. But why did not anybody suggested to use time relay that will automatically switch lights on AFTER engine is running and the alternator does its job? Low beam – 55W, parking light – 5W, tale light another few watts. Simple math. Motorcycle batteries are not famous for their capacity. Ignition key turned on – lights on, the alternator on standby but the motorcycle does not work and the amps fly away. As long as the battery is in good condition, charged, and the motorcycle charging efficient, it should not be a problem. Unless milk has been left on a hob and the rider has to run on the 10th floor because the lift is out of order. But he also left the key in a motorcycle with lights on… Gadgets or heated grips left on during night can drain the battery as well… Low temperature can also cause a headache when a motorcycle is left for a week trekking at the Himalayas. After coming back from trip rider tries to start the engine and instead of a cherish roar hears slower pat-pat until all that remains with him is silence… Then it can be less interesting. These additional tens of watts used by the motorcycle before the start-up of the engine can be a determinant between “we go” and “we struggle”. That’s why I want to have them!!
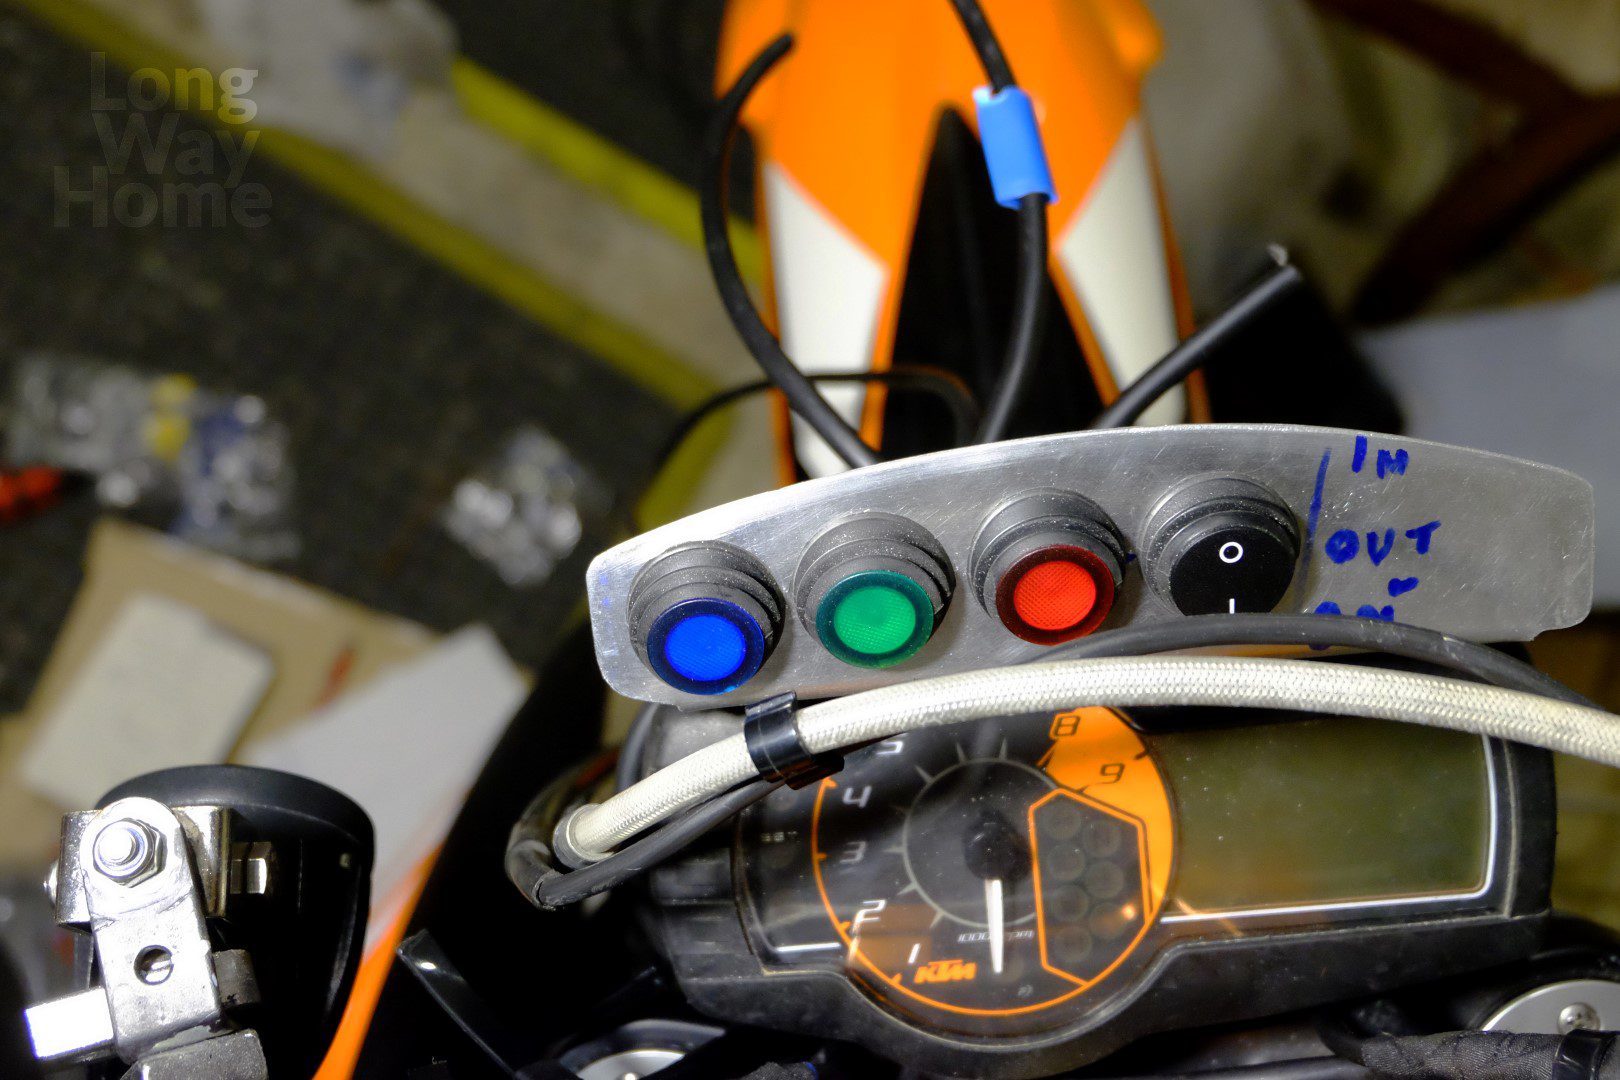
Light switch
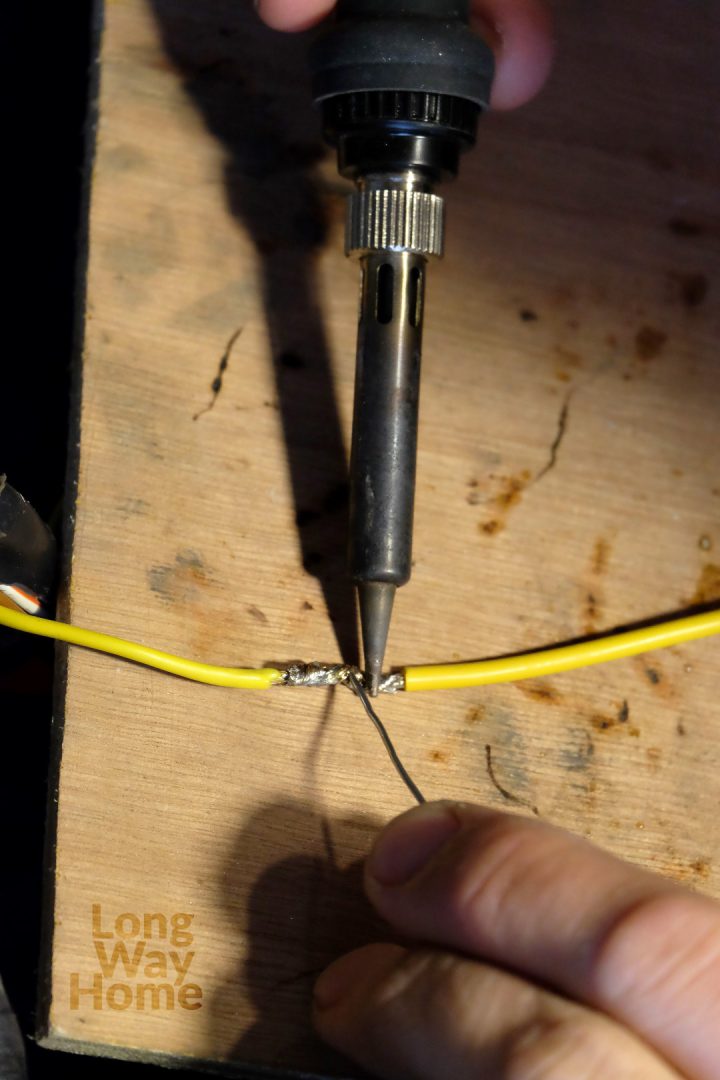
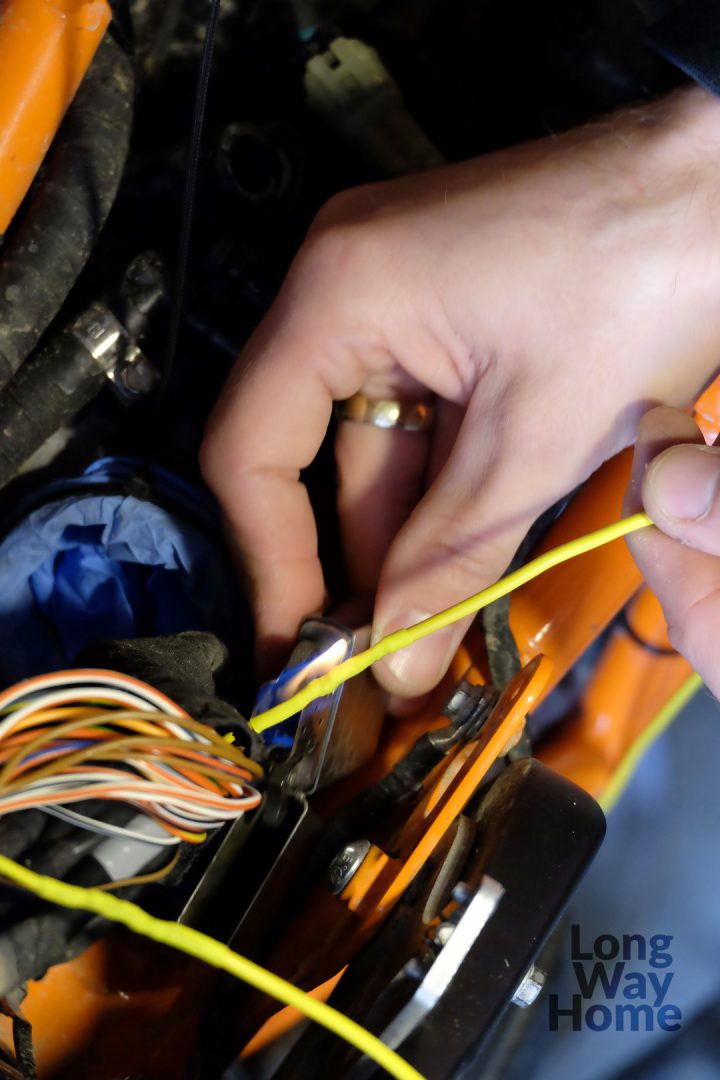
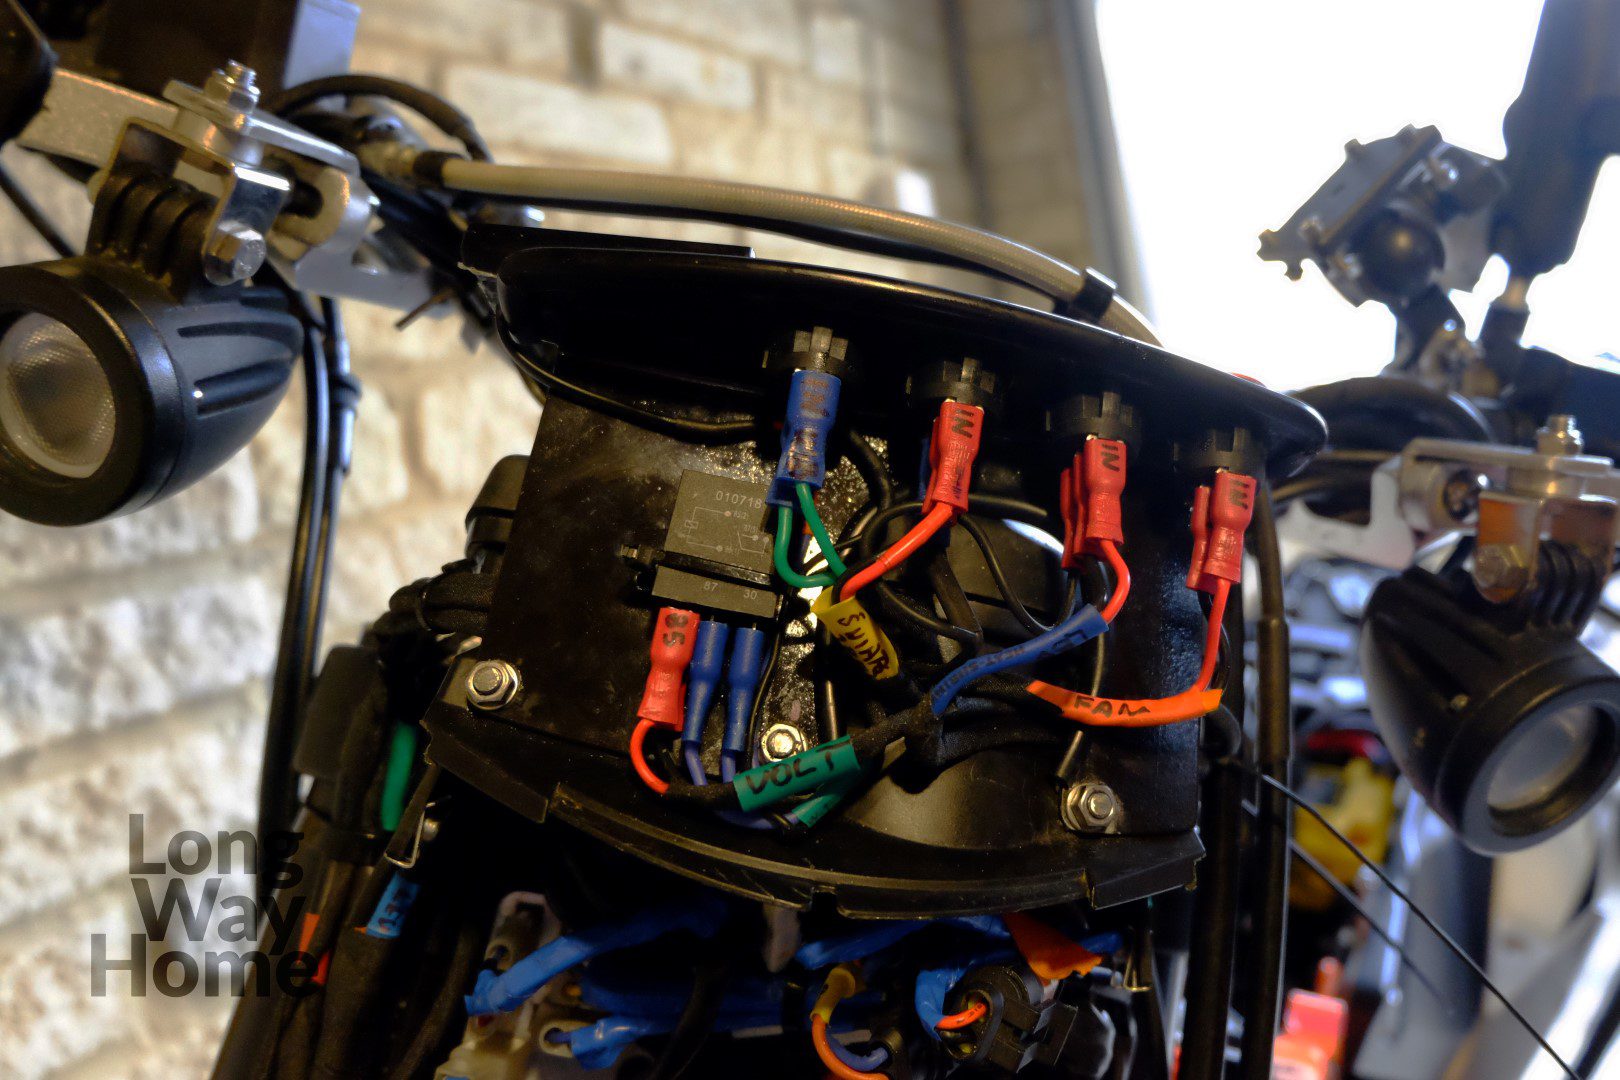
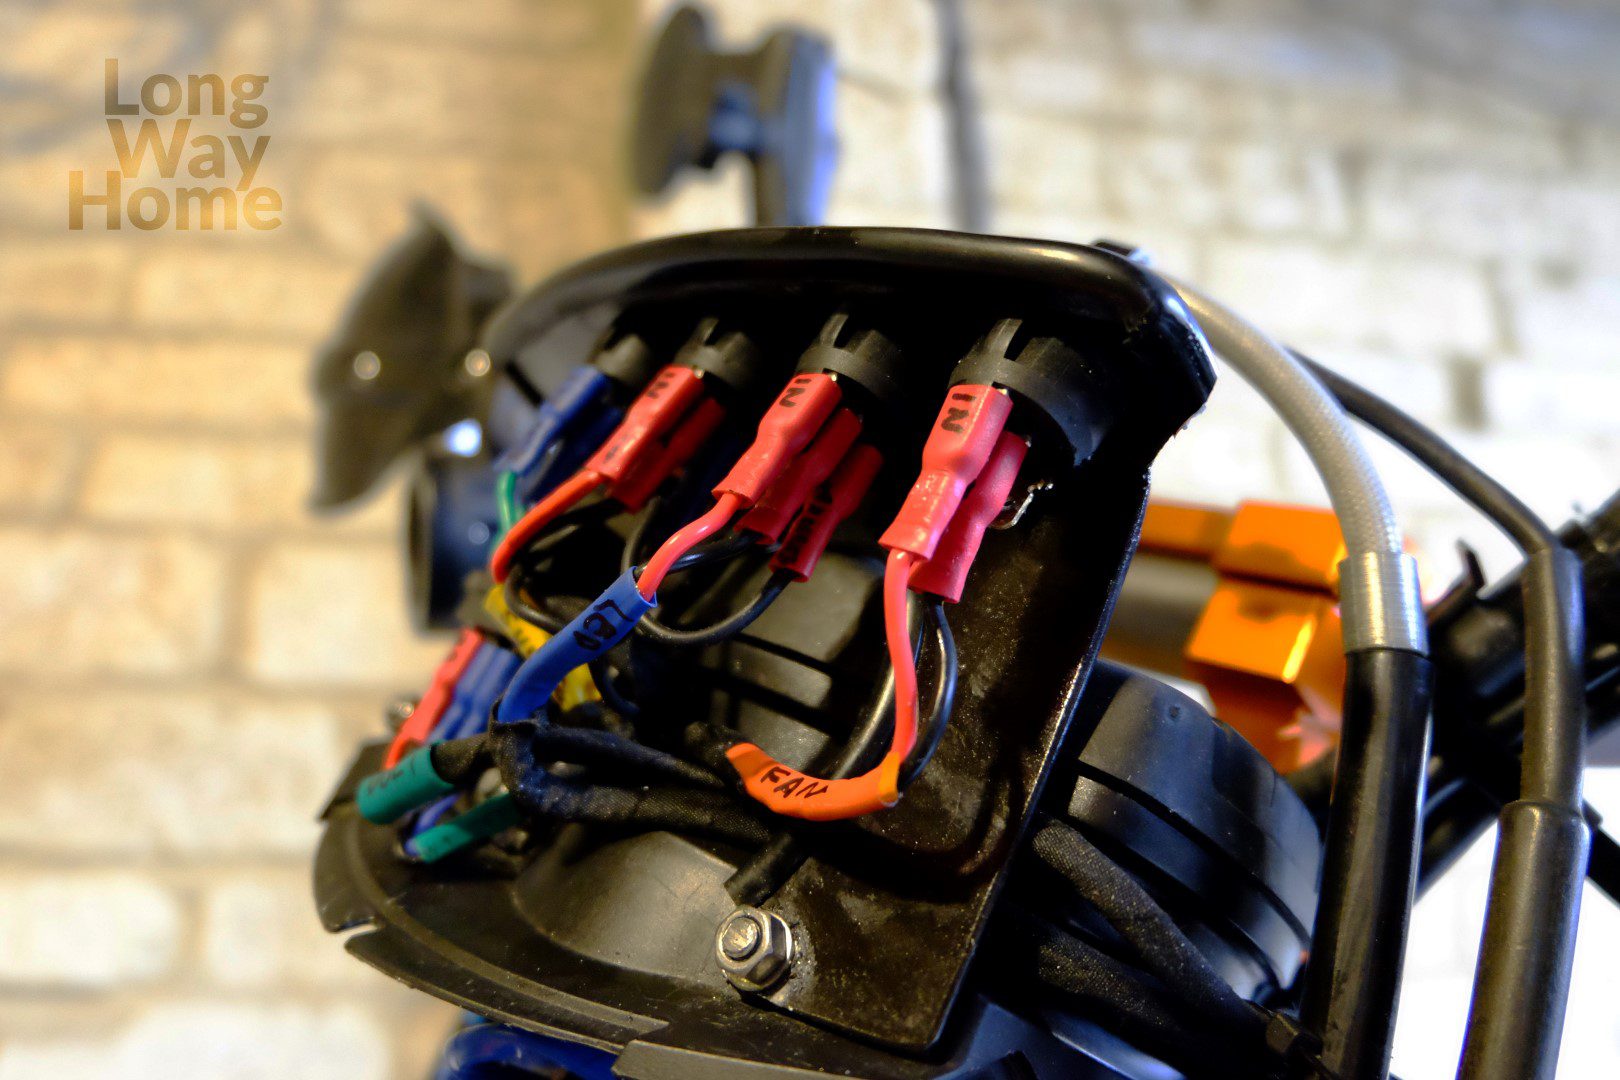
An important, in my opinion, modification is to add a simple light switch, connect it to the appropriate cables and problem is solved. The service manual comes handy again, allowing to identify the cable to which switch must plug in. The switch should meet two important criteria – waterproofness and be adapted to the current that will flow through it. Water tightness tested by pouring the switch with a steady stream of water for a long time, which did not cause a short circuit. During current tests, the switch held 12A passed through it (according to manufacturer 20A is the highest current it will handle without fail). Measurements of power consumption oscillated within 5A with a short jump to 7A when switching from low to the main beam. The result is consistent with the power of the bulbs used in the motorcycle. The switch passed the exam and so far does its job. When riding lights can be switched on, however, the motorcycle has more power for a start – and that’s what I wanted!!
It is still possible to use a time relay that automatically activates the lights after the engine is running, but I prefer the manual version as more versatile.
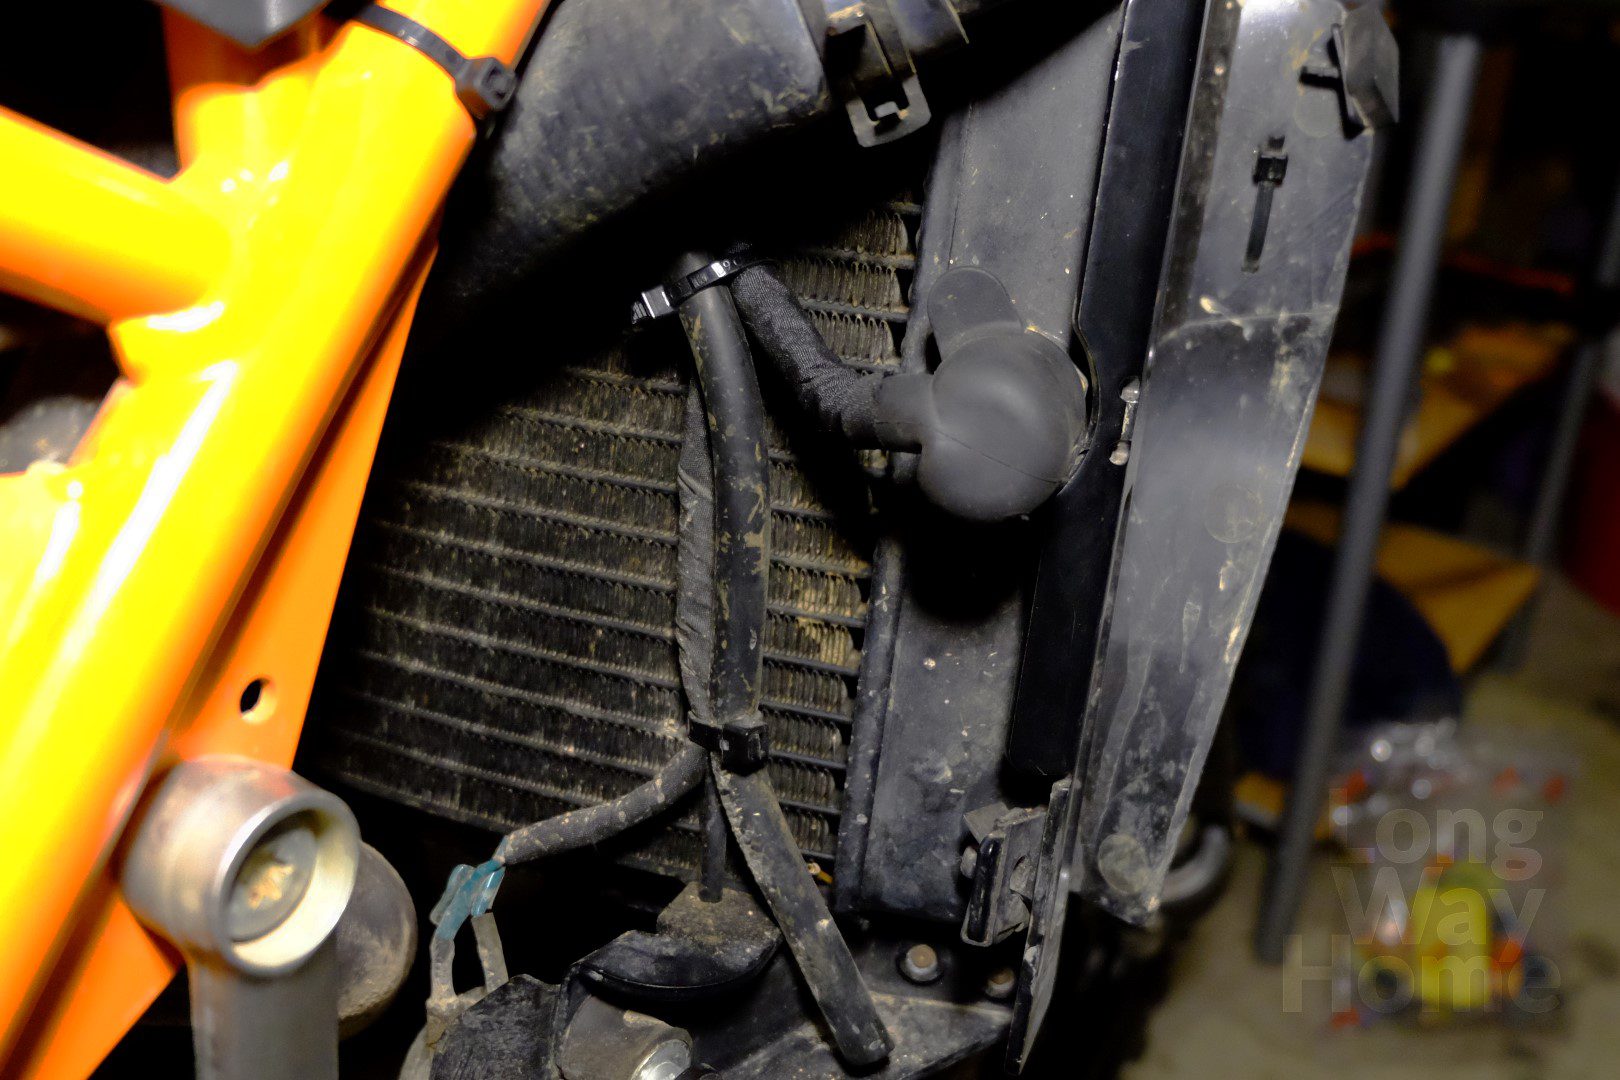
Radiator fan switch
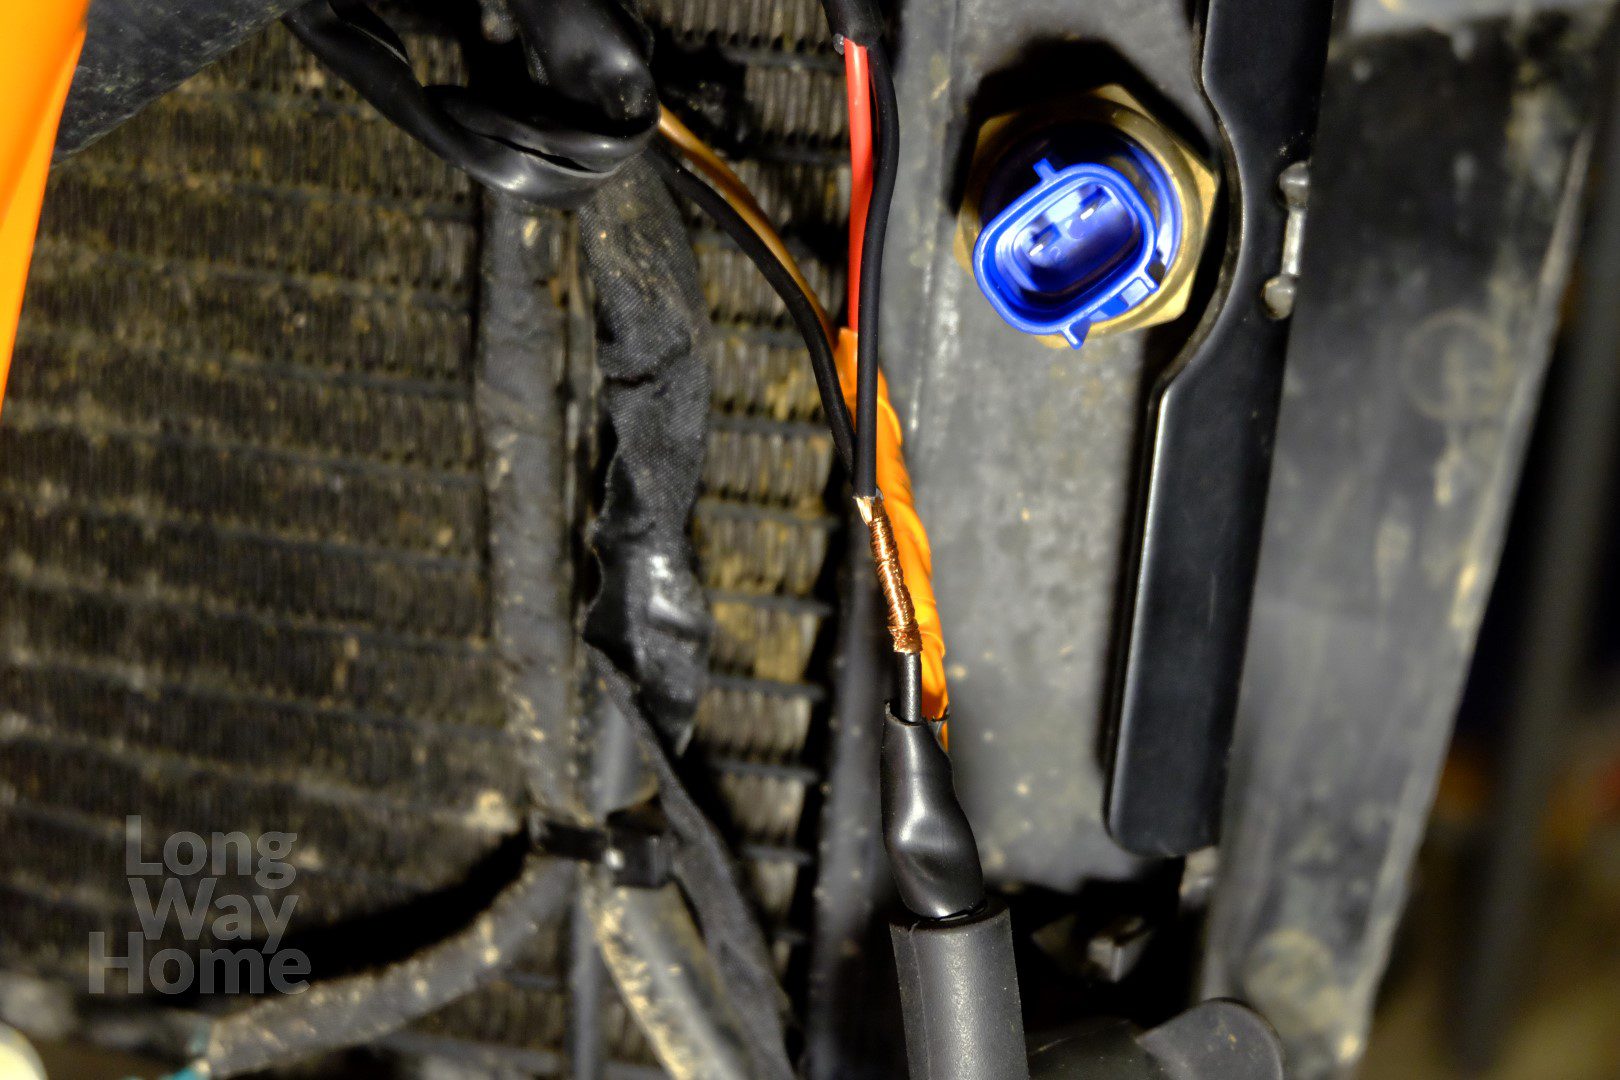
The second switch, which I decided to put on, will be used to manually turn on the radiator fan. The temperature sensor starts fan automatically, but it happens at a quite high temperature – as far as I know at about 100ºC. Riding in a traffic jam or slow progress through rough terrain causes frequent heating of the cooling liquid to the temperature when the fan starts. To maintain the correct temperature, I added mentioned switch, thanks to I will be able to force the fan to stay on for longer. This will help to keep the temperature at the desired level or after switching motorcycle off will speed the cooling process. Of course, there are sensors that will start a fan at a lower temperature, but personally, I do not like this idea.
LED lights and USB socket switches
Other switches I have used in front of the panel are responsible for running additional LED lights and a small USB charger.
LED lights will be able to start only after turning the key on. However, thanks to the ability to turn main lights off which consume quite a large dose of energy, we will be able to illuminate the place needed without an unnecessary dent to the battery or starting the motorcycle.
On the other hand, the USB charger switch can start the power transmission even if the ignition key is not left in the motorcycle. The charger will be connected directly to the battery, of course using a proper fuse and the switch on the way. Thanks to this, in “safer” places we will be able to leave a phone or action camera at a charge, while we will still put the tent up or try to warm up in it. At night, the gadget will be taken back by the owner, so the charger will also get turned off.
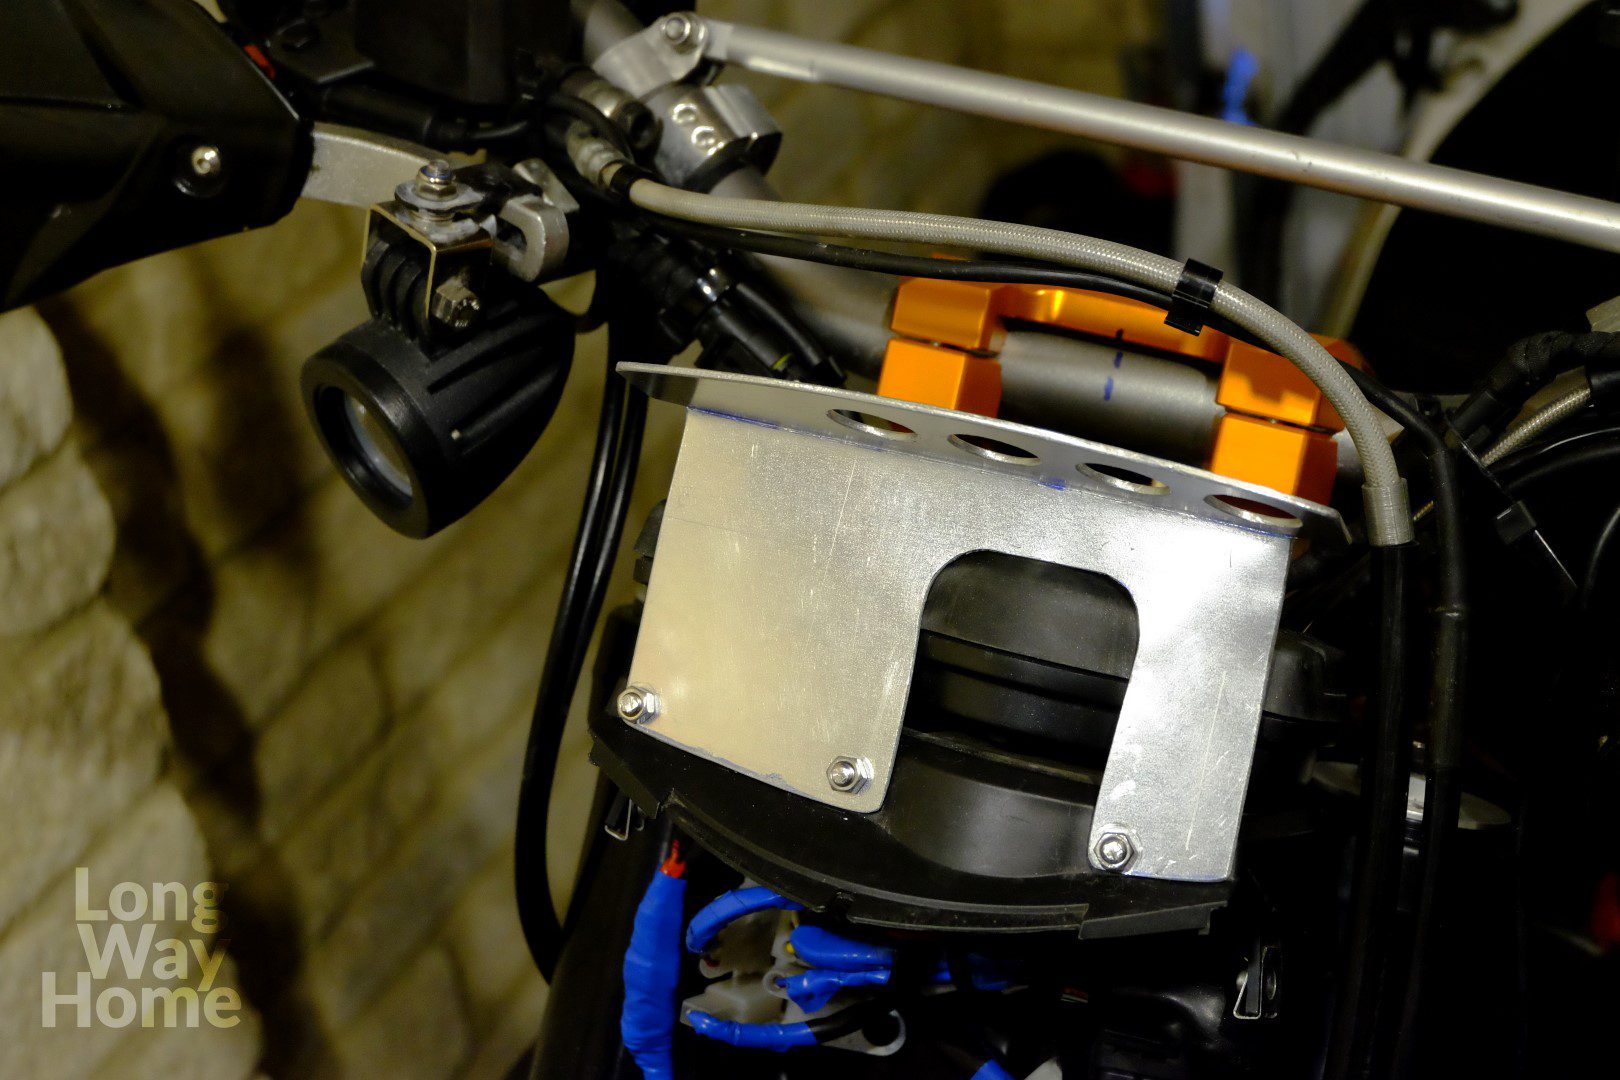
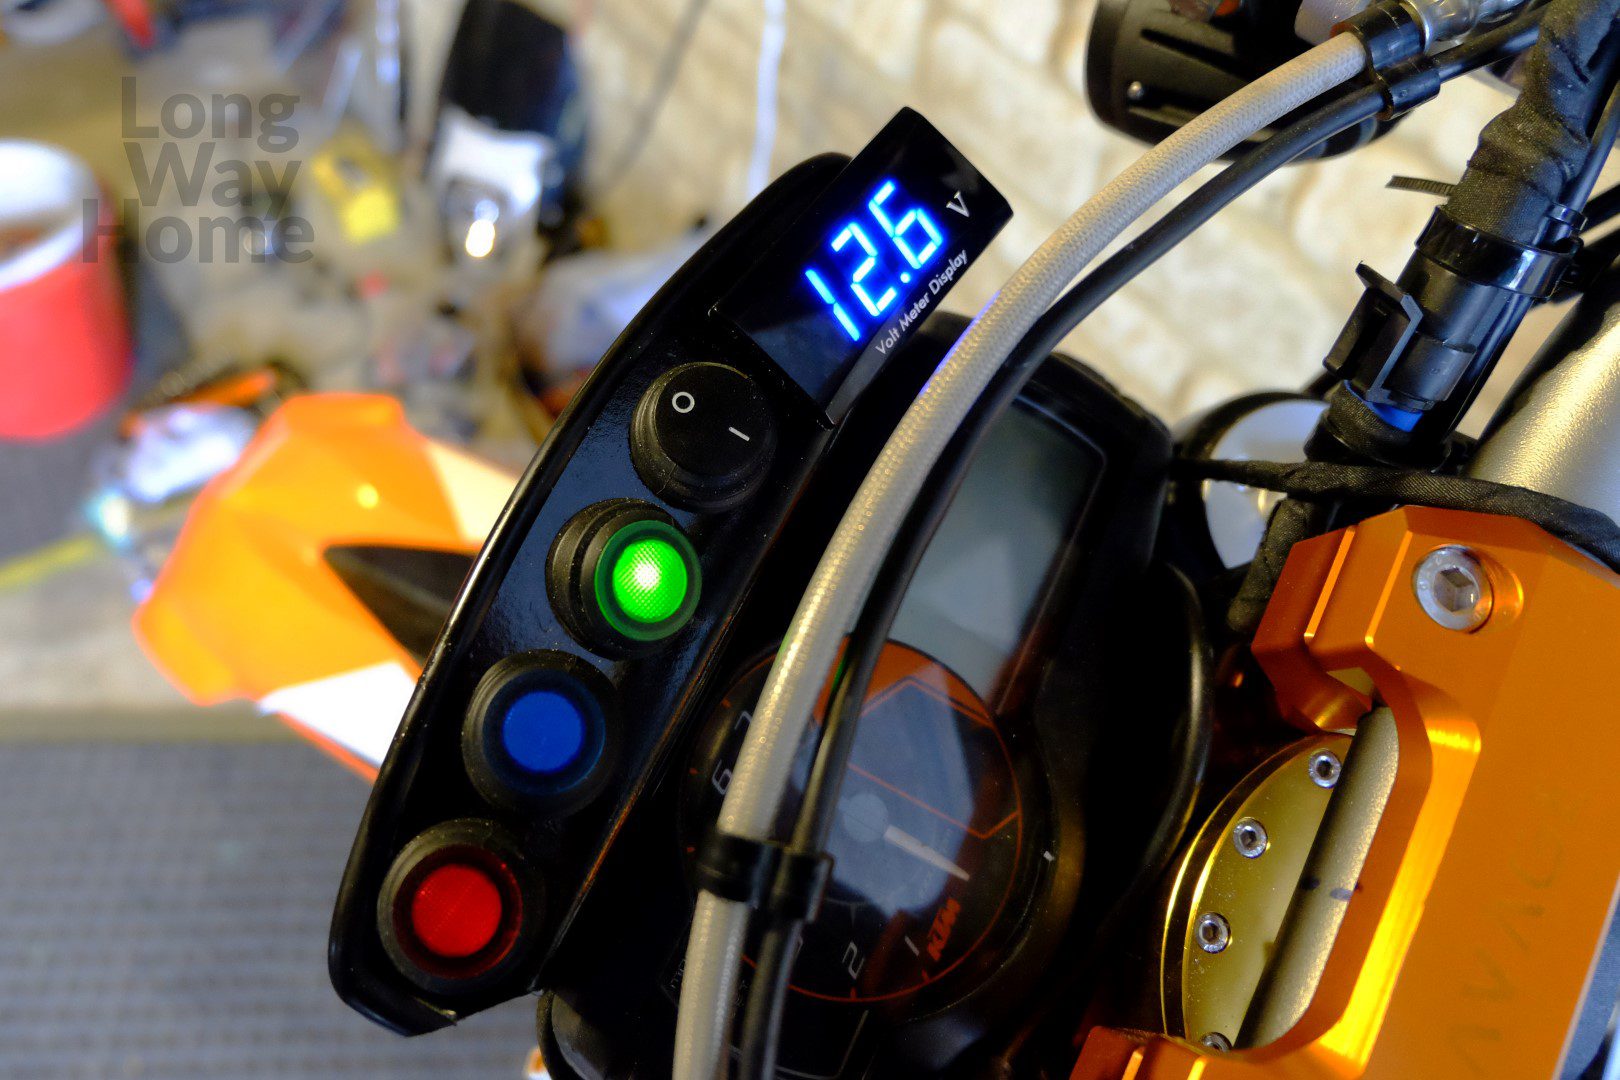
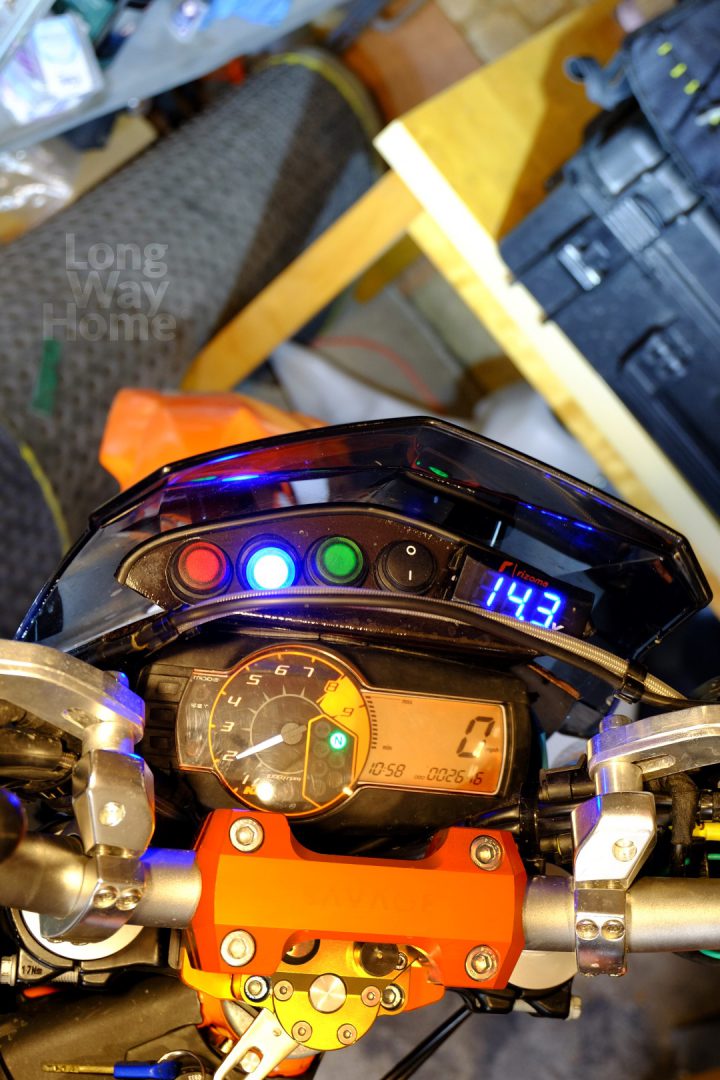
Control panel with voltmeter
As our motorcycles do not have fairings or plastics in the front of them, where we could mount all of the above-mentioned switches, I had to think of a way to install them. I did it thanks to the use of a small windshield. No, I would not mount it in my life if there was no need to cover the panel – its efficiency of wind protection is close to none. Behind the fairing, I placed a small panel made of aluminium. Despite its size, I managed to get a voltmeter on it, so that we can monitor the performance of the battery and charging system.


5 Comments
Philip O'Connell · 4 April 2020 at 13:48
Hi,
Liveb your page and build, really nicely documented and the bikes look great!
I’m looking at doing something similar on my 690, would you have wiring diagram sketches that you might share?
I’m pretty new to electronics and trying to figure out exactly what you’ve done with fuses, relay switches etc.
Thanks a million.
Philip
Luki · 8 April 2020 at 18:32
Hi Philip.
Unfortunately, I do not have any diagram of what I have done in motorcycles. I am also pretty new to electronics and I learned and figured things out while I have worked on them. So far everything worked fine 🙂 Overall I have followed some guides found on the Internet and got some advice from my friends.
I do also remember most of what I have done and how I run wires etc but will not be able to give it a quick check as motorcycles are currently with the shipping company and do not have access to them because of a virus 🙁
If you want I can try to write it down from my memory and pictures I have and send it to your email address 🙂 It will just take some time 😉
Anonymous · 12 April 2020 at 13:28
Luki,
Thanks for the quick reply. No need to draw it out all, was just wondering if you had the diagrams easy.
I’ll do my research and see how i get on.
Best,
Philip
Jeff Rogers · 14 May 2020 at 06:12
Do you make and sell such a switch panel? How do you identify which light is for which function?
Thank you.
Luki · 15 May 2020 at 22:12
Hi Jeff.
No, I do not make such panels. This was just a one-time job to get buttons in a place. Everything homemade. When it comes to buttons – Green is responsible for lights, Blue for LED lights, Red is to manually control the radiator fan and black is to switch on/off a USB socket which sits on a handlebar.
Łukasz